How to Cook Broccolini Easy Steps for Delicious Results
Broccolini is a delicious green vegetable that deserves a place on your dinner table. This hybrid vegetable was created in 1993 by the Sakata Seed Company. It blends the best qualities of broccoli and Chinese kale into one tasty package.
Learning how to cook broccolini opens up many cooking possibilities. You can roast it, steam it, sauté it, or grill it. Each method brings out unique flavors and textures. The key is understanding which technique works best for your meal.
This guide walks you through every step. You will discover professional cooking methods used by chefs across the United States. Your broccolini will turn out tender-crisp every single time you cook it.
Key Takeaways
- Broccolini has a milder and sweeter flavor than regular broccoli
- You can prepare broccolini using five main cooking methods
- Proper preparation ensures even cooking throughout your bunches
- Cooking time varies based on your chosen cooking method
- Fresh broccolini has bright green stalks with no yellow spots
- Testing for tenderness prevents overcooked vegetables
- Simple seasonings bring out the natural taste of broccolini
Understanding the Basics of Broccolini
Broccolini is a leafy green vegetable that deserves a spot on your dinner table. This Italian vegetable offers something special compared to standard broccoli. Understanding what makes it unique helps you cook it better and enjoy its flavor more fully. Learning about broccolini cooking methods starts with knowing exactly what you are working with in your kitchen.
What Makes Broccolini Unique
Broccolini stands apart because of its long, thin stalks and smaller florets. Unlike regular broccoli with its thick trunk and large head, broccolini is entirely edible from top to bottom. You do not need to cut away tough parts or waste anything. The tender stalks taste sweet and mild, making them perfect for various preparation styles.
The entire plant offers a pleasant eating experience. Stalks deliver a slight sweetness with a delicate crunch. Florets remain small and cook evenly throughout. This structure makes broccolini ideal for many different broccolini cooking methods you can use at home.
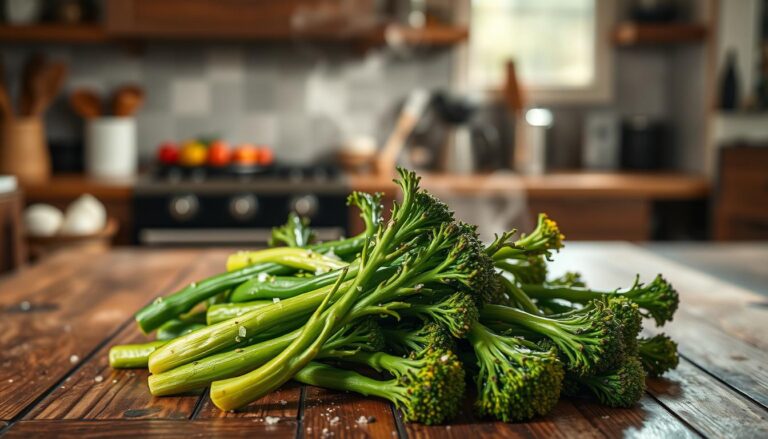
Selecting Fresh Bunches at the Market
Finding quality broccolini starts with knowing what to look for when you shop. Use these simple tips to pick the best bunches:
- Look for firm, bright green stalks without any soft spots
- Check that buds are tightly closed and dark green
- Avoid any yellowing or wilted leaves
- Feel the bunch for crisp texture
- Skip bunches with brown spots or mushy areas
Fresh broccolini makes a real difference in how your dish turns out. Starting with quality produce ensures better results when you apply various broccolini cooking methods. Store your bunches in a plastic bag in the refrigerator for up to five days before cooking.
| Quality Indicator | Fresh Broccolini | Avoid |
|---|---|---|
| Color | Bright, dark green | Yellow or pale green |
| Stalks | Firm and crisp | Soft or limp |
| Florets | Tightly closed buds | Open or loose florets |
| Appearance | No spots or damage | Brown spots or wilting |
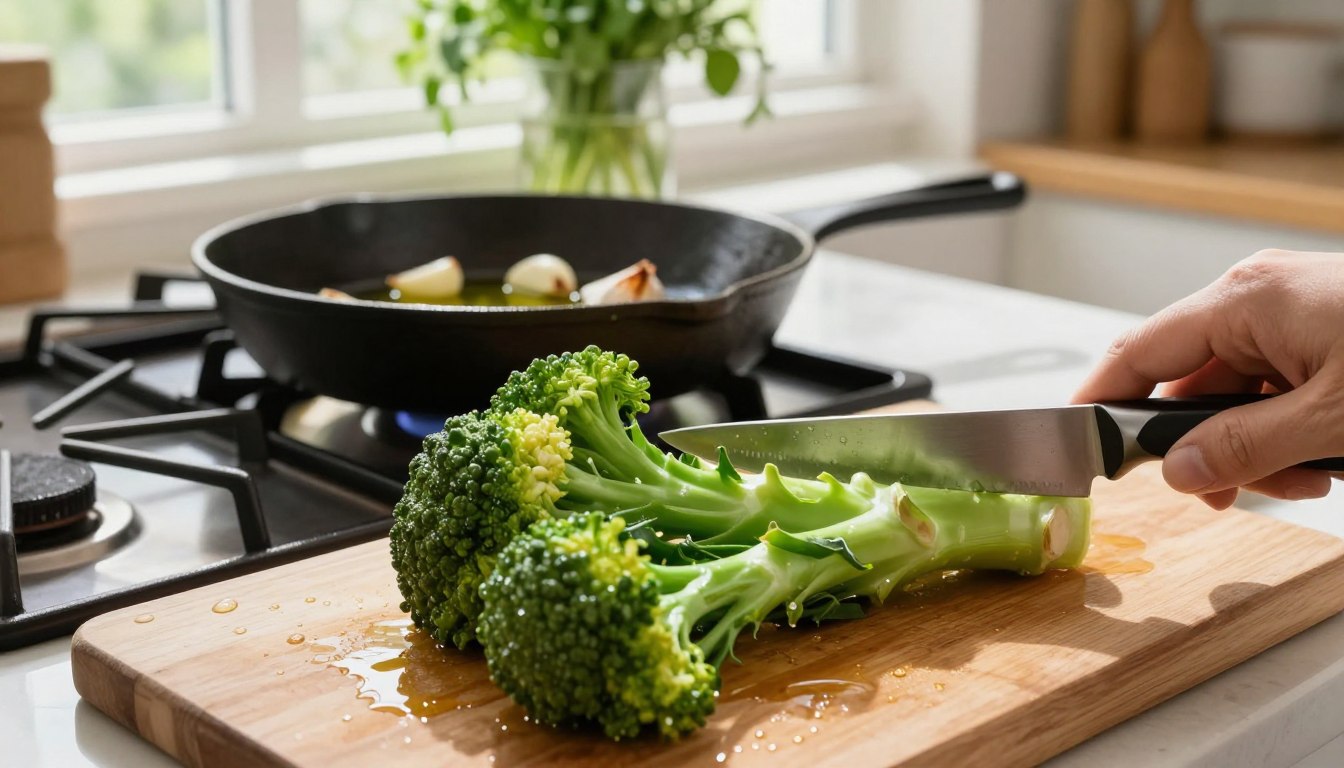
Essential Broccolini Preparation Tips
Getting your broccolini ready for cooking is the most important step. Proper preparation means your vegetables will cook evenly and taste their best. Taking a few minutes to prepare your broccolini correctly sets you up for success in the kitchen, no matter which cooking method you choose.
Start by rinsing your broccolini under cold running water. This removes dirt, sand, and field debris that might be hiding in the florets and stalks. Use your fingers to gently rub the bunches while the water runs over them. Make sure to rinse thoroughly between the flowering tops where grit likes to hide.
Next, trim the woody ends of your stalks. Cut about half an inch from the bottom of each bunch with a sharp knife. These tough, fibrous ends won’t become tender no matter how long you cook them. Removing them ensures every bite of your broccolini will be pleasantly tender.
Following these broccolini preparation tips will help keep your stalks sturdy and intact during cooking. Your vegetables will maintain their structure while cooking evenly from top to bottom. Proper prep work takes just a few minutes but makes a huge difference in your final dish.
- Rinse under cold water to remove all dirt and sand
- Gently rub florets to clean between layers
- Trim approximately half an inch from the base
- Use a sharp knife for clean cuts
- Pat dry with paper towels before cooking
Dry your broccolini with paper towels or a clean kitchen towel after rinsing. Moisture on the surface can affect how your broccolini cooks, particularly if you’re roasting or sautéing. Drying helps create better texture and allows seasonings to stick more effectively.
How to Cook Broccolini for Perfect Texture
Getting the right texture when cooking broccolini comes down to two key decisions. You need to prepare your stalks correctly, and you need to choose the right cooking surface. These choices work together to give you broccolini that is crisp on the outside and tender on the inside.
The texture you achieve depends on how you handle the vegetable before it hits the heat. Your cooking surface matters just as much as your technique. When you combine proper preparation with the right equipment, you get results that taste restaurant-quality.
Preparing Your Stalks for Even Cooking
Broccolini stalks come in different thicknesses. Thicker stalks need special attention to cook at the same speed as thinner ones. You have two options to solve this problem:
- Peel the thick stalks with a vegetable peeler to reduce their thickness
- Cut thicker stalks lengthwise to match the size of thinner stalks
- Let thicker stalks cook for an extra 1-2 minutes before adding thinner ones
Even cooking means every piece reaches the perfect doneness at the same time. This prevents you from ending up with some pieces that are mushy and others that are still hard.
Choosing the Right Cooking Surface
The pan you select makes a real difference in your final results. Your cooking surface controls how heat spreads across your broccolini.
| Cooking Surface | Best For | Why It Works | Heat Distribution |
|---|---|---|---|
| Cast-Iron Skillet | Roasting and searing | Retains heat exceptionally well for browning | Even and consistent |
| Stainless Steel Pan | Sautéing and pan-cooking | Heavy-bottomed versions prevent hot spots | Excellent heat distribution |
| Non-Stick Pan | Quick sautéing with oil | Requires less oil for cooking | Moderate |
| Baking Sheet | Oven roasting | Allows air circulation for crispness | Uniform across surface |
A heavy-bottomed stainless steel pan or cast-iron skillet gives you the best control. These surfaces distribute heat evenly across the bottom. This means you get browning and searing instead of steaming. When broccolini steams in its own juices, it becomes soft and loses its appealing texture.
Your choice of cooking surface directly affects whether you get that crisp-tender consistency that makes broccolini taste so good. The right pan keeps your vegetable from releasing too much moisture, which keeps it from getting soggy.
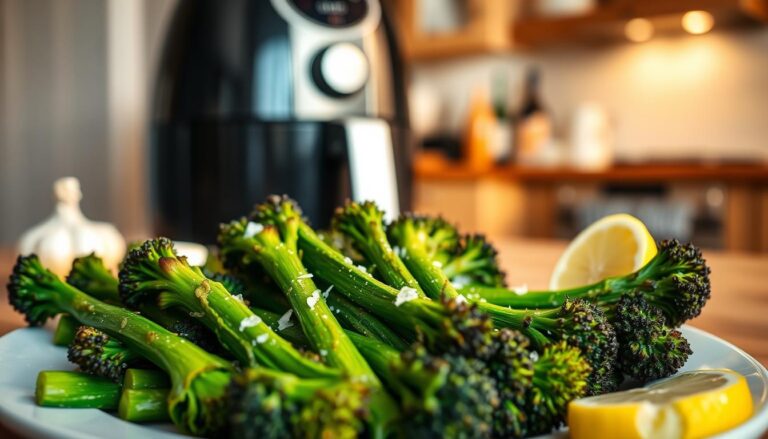
Mastering the Roasted Broccolini Instructions
Roasting brings out the best in broccolini by concentrating its natural sugars and creating a delicious caramelized flavor. This cooking method transforms the vegetable into something truly special. When you follow roasted broccolini instructions carefully, you’ll get tender florets with crispy, charred edges that taste nutty and rich.
The beauty of roasting lies in how the heat caramelizes the outer surfaces. Your broccolini develops a complex taste that steamed or boiled versions simply cannot match. This technique works perfectly for busy weeknight dinners or fancy side dishes.
 are expertly tossing the vegetables in a bowl, emitting an inviting cooking atmosphere. The background showcases a softly lit kitchen with warm, natural lighting, highlighting the gleam of the roasted vegetables and creating a cozy, delicious ambiance. The overall mood is inviting and aspirational, emphasizing the joy of cooking. The scene is framed closely to focus on the details of the broccolini and the cooking process.")
Getting Your Broccolini Ready
Start by patting your broccolini stalks dry with paper towels. Moisture prevents proper browning. Arrange the pieces in a single layer on your rimmed baking sheet.
Coating and Seasoning
Drizzle your broccolini with high-quality olive oil. Use enough oil to coat each stalk evenly. Sprinkle with kosher salt and cracked black pepper to taste. You can add garlic powder or red pepper flakes for extra flavor.
Roasting Process
Set your oven to 400 degrees Fahrenheit. Place the baking sheet in the center rack. Roast for 15 to 20 minutes. Watch for browning on the edges and tips.
- Check at the 12-minute mark
- Look for dark green to light brown coloring
- Shake the pan halfway through cooking
- Remove when edges are charred
These roasted broccolini instructions produce perfectly tender vegetables with incredible flavor depth. The cooking time may vary based on stalk thickness and your oven’s actual temperature.
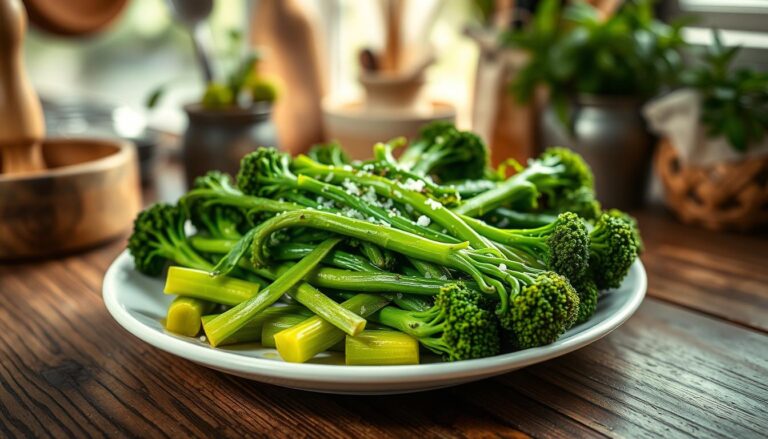
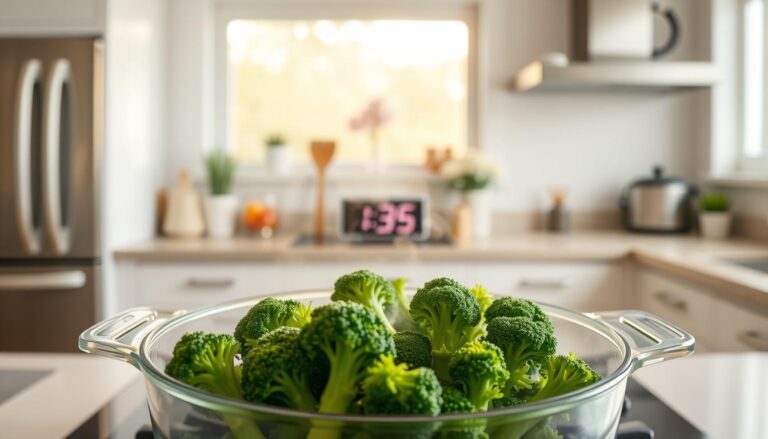
Simple Steamed Broccolini Technique
Steaming stands out as one of the gentlest cooking methods available for preparing broccolini. This approach locks in nutrients while keeping your vegetable crisp and tender. You can create restaurant-quality results using basic kitchen equipment you likely own right now. The steamed broccolini technique works wonderfully when you want maximum flavor with minimal added fats.
Steaming takes just minutes from start to finish. Your broccolini stays vibrant and maintains its delicate texture. Unlike boiling, which can make vegetables mushy and water-logged, steaming cooks your bunches evenly without stripping away essential vitamins and minerals.
Using a Stovetop Steamer Basket
Getting started with your steamer basket requires minimal preparation. Fill a pot with one inch of water and place your steamer basket inside. Bring the water to a rolling boil before adding your prepared broccolini stalks. Arrange them in a single layer with stems facing down for even heat distribution.
Cook your broccolini for three to five minutes depending on stalk thickness. Thinner stalks need less time, while thicker ones benefit from the full five minutes. A simple fork test tells you when your vegetables reach perfect tenderness without becoming soft or falling apart.
Retaining Vibrant Green Color
Bright green color signals fresh, nutrient-rich broccolini. Steam’s gentle heat preserves this appealing appearance better than other cooking methods. Remove your bunches immediately when they reach desired tenderness to stop the cooking process.
- Keep the lid on your pot during steaming to trap heat effectively
- Use filtered water to prevent mineral buildup on your steamer basket
- Avoid overcrowding the basket for consistent cooking results
- Pat dry any excess moisture before serving
| Stalk Thickness | Cooking Time | Texture Result |
|---|---|---|
| Thin (under 1/2 inch) | 2-3 minutes | Tender and crisp |
| Medium (1/2 to 3/4 inch) | 3-4 minutes | Tender with slight firmness |
| Thick (over 3/4 inch) | 4-5 minutes | Fully tender throughout |
This steaming method delivers perfectly cooked broccolini every time. Your vegetable maintains its nutritional value, stunning color, and pleasant texture. Season with salt, pepper, garlic, or lemon juice to enhance the natural flavors.
Quick Sautéed Broccolini Recipe
Sautéing gives you a fast and tasty way to prepare broccolini for your dinner table. This cooking method takes just five minutes, making it perfect when you need a healthy side dish on busy weeknights. The high heat brings out natural sweetness while creating tender, crispy edges that taste amazing.
A sautéed broccolini recipe starts simple. You need basic ingredients and a wide skillet to get restaurant-quality results at home. This approach works well because you can add bold flavors while cooking.

Getting Started with Your Sauté
Begin by heating one tablespoon of oil in a wide skillet over medium-high heat. You want the pan to get hot before adding your broccolini stalks. Once the oil shimmers, add your prepared broccolini in a single layer.
Cook without stirring for two to three minutes. This allows the stalks to develop a golden, charred exterior. Stir occasionally after this initial cooking phase.
Flavor Combinations That Work
Your sautéed broccolini recipe becomes special when you add aromatics. Consider these simple flavor boosters:
- Minced garlic cloves for rich, savory depth
- Red pepper flakes for gentle heat and spice
- Fresh lemon zest for brightness and tang
- Soy sauce for umami richness
- Sesame oil for nutty, toasted notes
Add your chosen seasonings during the last minute of cooking. This prevents burning while allowing flavors to blend with the warm broccolini.
“Quick cooking methods like sautéing preserve the vegetable’s natural nutrients and vibrant color.”
Total cooking time stays under five minutes from pan to plate. Your sautéed broccolini recipe delivers nutrition and taste without keeping you in the kitchen.
Expert Tips for Blanching Broccolini Steps
Blanching is a professional cooking technique that helps you preserve the bright green color and crisp texture of your broccolini. This method involves briefly cooking the vegetable in boiling water, then shocking it in ice water to stop the cooking process. Understanding blanching broccolini steps gives you the ability to prepare vegetables ahead of time for salads, side dishes, or meal prep containers.
The blanching process works best when you follow a specific sequence. You need to bring a large pot of salted water to a rolling boil before adding your broccolini bunches. The salt enhances flavor and helps maintain the vibrant green color throughout the cooking process.
The Importance of the Ice Water Bath
The ice water bath is the most critical step in blanching broccolini steps. Immediately after removing your broccolini from the boiling water, you must submerge it in a bowl filled with ice and cold water. This rapid cooling stops the cooking process instantly and prevents the vegetable from becoming soft or mushy.
- Fill your ice bath bowl before you start boiling water
- Use plenty of ice to keep the water cold throughout
- Transfer broccolini directly from boiling water to ice bath
- Drain thoroughly after cooling to remove excess water
Timing Your Blanching Process
Timing is everything when executing blanching broccolini steps correctly. You should submerge your broccolini stalks in boiling salted water for exactly 2 minutes. This timing allows the vegetable to become tender while maintaining its bright green color and crisp bite.
| Broccolini Size | Boiling Water Time | Ice Bath Duration |
|---|---|---|
| Small stalks | 1.5 to 2 minutes | 2 to 3 minutes |
| Medium stalks | 2 to 2.5 minutes | 3 to 4 minutes |
| Large stalks | 2.5 to 3 minutes | 4 to 5 minutes |
After blanching broccolini steps are complete, you can use your vegetables immediately or store them in airtight containers in your refrigerator for up to five days. This preparation method works perfectly when you want to prep vegetables in advance for busy weeknights or cold salad ingredients.
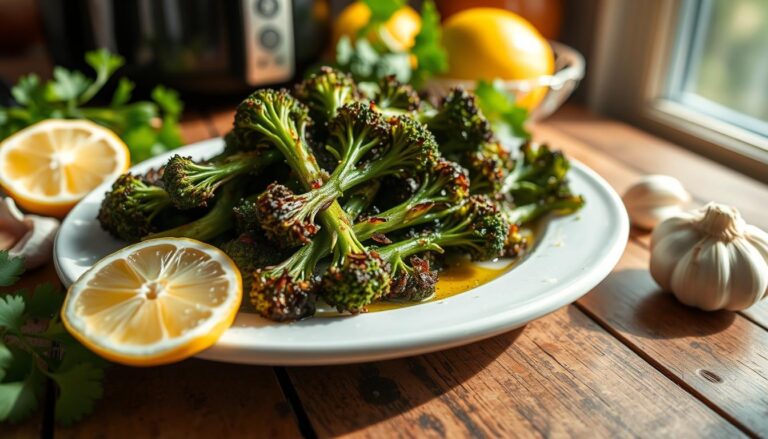
Achieving Char with the Grilled Broccolini Method
Grilling transforms broccolini into a restaurant-quality dish with a smoky flavor that brings out the vegetable’s natural sweetness. The grilled broccolini method creates beautiful char marks that make this side dish look impressive for your next outdoor gathering. This cooking approach works best when you understand the basics of heat management and timing.
The key to success lies in preparation. Start by washing your broccolini bunches and patting them dry with paper towels. Moisture prevents proper charring on the grill. Next, lightly coat your stalks with olive oil. This oil helps conduct heat and prevents sticking while creating that desirable crispy exterior.
Once your broccolini is ready, preheat your grill to medium-high heat. Place the stalks perpendicular to the grill grates so they don’t fall through. This positioning allows the heat to cook all sides evenly. Grill for approximately 6 to 8 minutes, rotating occasionally to achieve even charring.
Your timing matters when using the grilled broccolini method. Watch for the stalks to turn tender-crisp with dark brown or black char marks. These marks indicate caramelization, which adds depth to the flavor profile. Avoid leaving your broccolini on the grill too long, as overcooking makes the florets mushy.
- Coat stalks lightly with olive oil
- Position perpendicular to grill grates
- Grill at medium-high heat
- Cook for 6 to 8 minutes total
- Rotate occasionally for even char
- Remove when tender-crisp
The grilled broccolini method elevates this humble vegetable into an elegant side dish. Season with sea salt, cracked pepper, or a squeeze of fresh lemon juice after cooking. Your guests will appreciate the sophisticated flavors that outdoor grilling brings to the table.
Managing Broccolini Cooking Time for Best Results
Getting the perfect broccolini cooking time is the key to serving a delicious vegetable dish. Timing matters more than you might think. Cook your broccolini too long, and you end up with mushy, unappetizing stalks. Rush the process, and the florets stay too tough to enjoy. The sweet spot lies between these two extremes.
Your goal is to achieve tender florets that still have a pleasant, crisp bite. This requires staying alert during the final minutes of cooking. Whether you are roasting, steaming, sautéing, or blanching your broccolini, paying close attention to the heat exposure makes all the difference in your final result.
Testing for Tenderness
The simplest way to check if your broccolini is ready involves using a paring knife. Pierce the thickest part of the stalk near the base. The knife should slide through with slight resistance. If the stalk feels mushy or the knife passes through without any effort, you have overcooked your vegetable.
You can also test by gently bending a stalk. It should bend slightly but not snap. A properly cooked stalk feels firm yet tender.
Avoiding Overcooked Vegetables
Remove your broccolini from heat while it still feels slightly firm to the touch. The florets will continue to soften from residual heat even after you turn off the burner or remove the pan from the oven.
- Start checking doneness a minute or two before you expect the broccolini to finish cooking
- Use a timer to track your cooking progress accurately
- Transfer cooked broccolini to a cool plate immediately to stop the cooking process
- Taste a small piece to confirm the texture meets your preferences
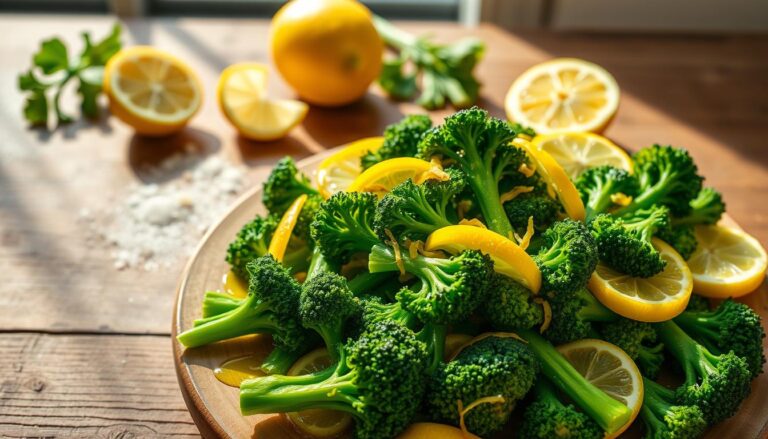
Flavor Pairings and Seasoning Ideas
Broccolini is a versatile vegetable that works well with many different flavors and seasonings. You can transform your cooked broccolini into something special by pairing it with the right ingredients. The mild, slightly sweet taste of broccolini makes it an ideal canvas for creative flavor combinations that suit any meal.
Your broccolini dish can go in several flavor directions depending on what you are serving for dinner. Classic pairings keep things simple and elegant, while bold seasonings add excitement to your plate.
Classic and Simple Pairings
Start with lemon juice and parmesan cheese for a bright, fresh taste. This combination brings out the natural earthiness of your broccolini. You can also try drizzling your cooked broccolini with quality olive oil and fresh garlic for a timeless Italian approach.
- Lemon zest with grated parmesan
- Olive oil and minced garlic
- Butter with sea salt
- Red pepper flakes for heat
Global Flavor Profiles
You can explore Asian-inspired flavors by using toasted sesame oil and soy sauce. These ingredients create a savory, nutty taste that pairs beautifully with your cooked broccolini. For a Mediterranean touch, try balsamic glaze, which adds a sweet and tangy depth to your vegetable.
| Flavor Profile | Key Ingredients | Best Cooking Method |
|---|---|---|
| Asian-Inspired | Sesame oil, soy sauce, ginger | Sautéed or roasted |
| Italian | Garlic, olive oil, parmesan | Sautéed or steamed |
| Mediterranean | Balsamic glaze, pine nuts, garlic | Roasted or grilled |
| Spicy | Chili oil, garlic, red pepper flakes | Sautéed or roasted |
Enhanced and Luxurious Touches
You can elevate your broccolini by adding toasted pine nuts for a crunchy texture. A sprinkle of chili oil brings warmth and spice to your dish. These additions turn simple cooked broccolini into something that feels fancy enough for dinner guests.
- Toast pine nuts in a dry pan until golden
- Drizzle your cooked broccolini with quality oil
- Sprinkle nuts and seasonings while hot
- Toss gently to coat evenly
Your broccolini becomes the perfect side dish when you match seasonings to your main course. Light proteins pair well with lemon and herbs, while richer meats work best with bold Asian or spicy flavors. Experiment with different combinations to discover your favorite way to enjoy this nutritious vegetable.
Conclusion
Learning how to cook broccolini gives you access to many delicious meal options. You can enjoy quick sautéed versions on busy weeknights. You can also prepare elegant roasted dishes for special dinners. The methods you’ve learned work well for any occasion or kitchen skill level.
The key to success lies in three main areas. First, prepare your broccolini the right way by trimming and sizing your stalks evenly. Second, time your cooking with care so the vegetable stays tender and crisp. Third, use seasonings and flavor pairings that match your taste preferences. These steps take just a few minutes but make a big difference in your final dish.
Your kitchen is now ready for better broccolini meals. Whether you choose steaming, grilling, blanching, or roasting, you have the skills to create restaurant-quality results at home. These techniques work for your family dinners and your gatherings with friends. Start using these methods today and watch your broccolini dishes improve with each meal you prepare.
FAQ
What is broccolini and how does it differ from regular broccoli?
Broccolini is a hybrid vegetable created in 1993 by the Sakata Seed Company that features long, thin stalks and smaller florets that are entirely edible from top to bottom. Unlike traditional broccoli, broccolini offers a milder and sweeter flavor profile, making it an excellent choice for various broccolini cooking methods. The vegetable’s tender stalks and delicate buds cook more quickly and evenly than standard broccoli, allowing you to achieve perfect results with minimal effort.
How do I select fresh broccolini at the market?
When shopping for broccolini, look for bunches with firm, bright green stalks and tightly closed, dark green buds. Avoid bunches showing any yellowing, wilting, or limp leaves, as these signs indicate the produce is past its prime. Fresh, high-quality broccolini is essential for mastering various broccolini preparation tips and ensuring your cooking experience yields the best possible texture and flavor.
What are the essential steps for preparing broccolini before cooking?
Proper broccolini preparation begins with a thorough rinse under cold running water to remove any field grit and debris. Next, you should trim about half an inch off the woody ends of the stalks using a sharp paring knife. This simple preparation technique ensures a tender bite throughout the entire vegetable while maintaining the structural integrity of the stalks. These broccolini preparation tips will help you achieve even cooking regardless of which cooking method you choose.
How long does it take to cook broccolini using different methods?
The broccolini cooking time varies depending on your chosen technique. Steamed broccolini requires just 3 to 5 minutes over boiling water, while sautéed broccolini takes approximately 5 minutes over medium-high heat. Roasted broccolini instructions call for 15 to 20 minutes at 400 degrees Fahrenheit, blanching requires exactly 2 minutes in boiling salted water, and grilled broccolini needs about 6 to 8 minutes over medium-high heat. Understanding these broccolini cooking time guidelines helps you plan your meal preparation accurately.
What is the best method for roasting broccolini?
Roasting is an excellent way to concentrate the natural sugars and create caramelized edges on your vegetable. For perfect roasted broccolini instructions, toss your stalks in high-quality olive oil, kosher salt, and cracked black pepper, then spread them in a single layer on a rimmed baking sheet. Roast at 400 degrees Fahrenheit for 15 to 20 minutes until the edges are beautifully charred. This method brings out a nutty, complex flavor profile that transforms broccolini into an impressive side dish.
How do I steam broccolini while maintaining its vibrant green color?
The steamed broccolini technique is a gentle cooking method that preserves both nutritional content and bright color. Place your stalks in a steamer basket positioned over one inch of boiling water and cook for 3 to 5 minutes until they reach your desired tenderness. For optimal results, immediately transfer the cooked broccolini to a bowl of ice water to stop the cooking process and lock in the vibrant green color. This method is ideal if you prefer a softer texture without added fats.
What ingredients do I need for a quick sautéed broccolini recipe?
A simple sautéed broccolini recipe requires just a few quality ingredients: one tablespoon of olive oil, your prepared broccolini stalks, minced garlic, kosher salt, and cracked black pepper. Optional additions include red pepper flakes, lemon zest, or fresh herbs to elevate the flavor profile. Heat your oil in a wide skillet over medium-high heat, add the stalks, and cook for approximately 5 minutes while stirring occasionally. This quick sautéed broccolini recipe is perfect for busy weeknights when you need a healthy side dish fast.
What is the correct blanching broccolini steps procedure?
Blanching broccolini steps is a professional technique used by chefs to preserve color while partially cooking the vegetable. First, bring a large pot of salted water to a rolling boil. Submerge your prepared stalks and cook for exactly 2 minutes. Immediately transfer the broccolini to a bowl filled with ice and cold water to stop the cooking process. This ice water bath is crucial for maintaining the bright green pigment and crisp texture. These blanching broccolini steps are essential if you plan to use the vegetable in cold salads or prep ingredients ahead for later meals.
How do I achieve the best char using the grilled broccolini method?
For optimal results with the grilled broccolini method, lightly coat your stalks in olive oil and arrange them perpendicular to the grill grates. Place them over medium-high heat for 6 to 8 minutes, turning occasionally to create an even, beautiful char. The natural sweetness of the broccolini caramelizes beautifully over the grill, creating a sophisticated side dish that’s perfect for outdoor barbecues. This grilling technique adds a distinct smoky flavor that elevates the vegetable’s taste profile.
How do I know when broccolini is cooked to the perfect texture?
Testing for doneness is crucial when managing broccolini cooking time. You can pierce the thickest part of the stalk with a paring knife; it should offer slight resistance but slide through easily. The vegetable should be tender yet still crisp, never mushy or overly soft. By staying attentive during the final minutes of cooking across any broccolini cooking methods, you prevent the stalks from becoming overcooked while retaining a pleasant, satisfying bite that delights your palate.
What seasoning ideas work best with cooked broccolini?
Broccolini acts as a versatile blank canvas for numerous flavor combinations from around the world. Simple options include lemon juice, parmesan cheese, and cracked black pepper, while more adventurous choices feature toasted sesame oil, soy sauce, and wasabi. You can enhance the natural earthiness by adding toasted pine nuts, balsamic glaze, chili oil, or fresh herbs like garlic, thyme, or basil. Experimenting with these diverse seasonings allows you to customize your dish to complement any main course you’re serving, making broccolini a perfect match for virtually any cuisine.
Should I peel the stalks if they seem thick?
If you encounter particularly thick stalks, you can achieve more even cooking by peeling away the outer woody layer using a vegetable peeler or paring knife. This preparation technique reveals the tender interior and ensures the stalk cooks at the same rate as thinner pieces. Alternatively, you can simply extend your broccolini cooking time slightly when using thicker stalks. This attention to stalk thickness is an important part of broccolini preparation tips that professionals use to guarantee perfect results every time.
What type of cookware is best for sautéing broccolini?
For the best sautéed broccolini recipe results, use a heavy-bottomed stainless steel pan or cast-iron skillet that provides superior heat distribution. These cookware options prevent the vegetable from steaming in its own juices, which is critical for maintaining the desired crisp-tender consistency. A wide skillet with low sides allows better air circulation around the stalks, promoting even browning and preventing moisture buildup. Investing in quality cookware significantly impacts your ability to execute various broccolini cooking methods successfully.
Can I prepare broccolini in advance for later cooking?
Yes, you can prepare broccolini ahead of time by rinsing and trimming the stalks, then storing them in an airtight container in your refrigerator for up to three days. However, for the freshest flavor and optimal texture, it’s best to cook broccolini the same day you purchase it. If you need to prepare ingredients well in advance, blanching broccolini steps provides an excellent option—blanch and ice-shock the stalks, then store them in the refrigerator. You can later reheat or use them cold in salads and other prepared dishes.
What is the difference between steaming and blanching broccolini?
While both steamed broccolini technique and blanching broccolini steps partially cook the vegetable, they serve different purposes. Steaming uses gentle, dry heat from boiling water vapor to cook the stalks while preserving nutrients and vibrant color, resulting in a soft texture ideal for serving immediately. Blanching submerges the stalks in boiling water for a brief period, then immediately shocks them in ice water to halt cooking, preserving crispness and color for use in cold dishes or future preparation. Choose steaming when you want a finished side dish, and choose blanching when you’re prepping ingredients for later use.
How do I prevent broccolini from becoming mushy?
Preventing mushy broccolini requires careful attention to broccolini cooking time and temperature control. Never exceed the recommended cooking duration for your chosen method, as overcooked stalks quickly lose their pleasant texture. Use a sharp paring knife to test for doneness by piercing the thickest part of the stalk—it should offer slight resistance. Remove the broccolini from heat immediately when it reaches the desired tenderness, and avoid overcrowding the pan when sautéing, as this creates steam that can soften the vegetable excessively.
Can I cook broccolini with other vegetables at the same time?
Yes, broccolini pairs well with many vegetables in roasted broccolini instructions and sautéed preparations. When roasting, you can combine broccolini with cherry tomatoes, bell peppers, or cauliflower on the same sheet pan, adjusting cooking times as needed for vegetables that require longer heat exposure. When sautéing, tender vegetables like garlic, snap peas, or mushrooms work beautifully alongside broccolini. Just ensure you add ingredients with longer cooking times first, then add broccolini during the final stages to prevent it from becoming overcooked.