How to Make Broccolini Easy Methods for Stove Oven & Grill
Learning how to make broccolini opens up simple cooking options for your kitchen. This guide walks you through three reliable methods to prepare this green vegetable. You can roast it in your oven, sauté it on your stove, or char it on your grill.
Each cooking method brings out different flavors and textures in broccolini. Your choice depends on what equipment you have and how much time you want to spend cooking. All three approaches deliver delicious results that work well with any meal.
Whether you cook for yourself or your family, these techniques keep things straightforward. You do not need special skills or fancy tools to succeed. Follow these steps, and you will make tender, tasty broccolini every single time.
Key Takeaways
- Broccolini cooks fast on the stove, taking just 5 to 7 minutes
- Oven roasting creates crispy edges and tender stems
- Grilling adds a smoky flavor and nice char marks
- Washing and trimming take only a few minutes before cooking
- Good olive oil and simple seasoning make all the difference
- Leftovers store well in the refrigerator for up to 4 days
- Avoid overcooking to keep your broccolini from becoming mushy
Understanding the Basics of Broccolini
Before you start cooking this delicious vegetable, it helps to know what makes it special. Broccolini stands apart from regular broccoli in several important ways. Understanding these differences prepares you to cook it properly and enjoy its best qualities.
What is Broccolini
Broccolini is a hybrid vegetable that was first created by the Sakata Seed Company in 1993. This company combined broccoli with Chinese kale to create something entirely new. The result is a vegetable that looks similar to broccoli but has a thinner, more delicate stem.
You’ll notice that broccolini has a milder and sweeter flavor compared to traditional broccoli. The stalks are tender and easier to eat. Many people prefer this gentler taste, which makes it perfect for different cooking methods. The entire plant, from the florets to the stem, is edible and enjoyable.
Nutritional Benefits of This Vegetable
This green vegetable packs powerful nutrients into every bite. Your body gets real benefits when you include it in your meals regularly.
- Vitamin C supports your immune system and fights illness
- Vitamin A helps your eyes stay healthy and strong
- Fiber aids your digestive system
- Calcium keeps your bones solid
- Potassium supports heart health
These nutrients work together to keep you healthy and energized. Adding broccolini to your diet gives you a nutrient-dense food that tastes great. This makes it an excellent choice for anyone seeking healthy meal options.
How to make broccolini at home
Learning how to make broccolini at home is simpler than you might think. You need just a few basic tools and ingredients from your kitchen. The process takes minimal time but delivers restaurant-quality results with tender stalks and a slightly crispy exterior. This approach works great regardless of which cooking method you choose next.
The beauty of making broccolini at home lies in its simplicity. You won’t need fancy equipment or hard-to-find ingredients. Most home cooks already have everything required in their kitchen right now. The key is understanding the basic technique that prepares your vegetables for success.
Before you start cooking, you’ll need to get your broccolini ready. This preparation step takes just a few minutes but makes a real difference in your final dish. Clean water and a sharp knife are your main tools for this stage.
What You’ll Need to Get Started
- Fresh broccolini bunches
- Clean running water
- Paper towels or clean kitchen cloth
- Sharp vegetable knife
- Cutting board
- Olive oil
- Salt and pepper to taste
The first step in how to make broccolini at home involves washing your vegetables thoroughly. Rinse them under cool water and gently rub the stalks and florets between your fingers. This removes any dirt or debris that might be hiding in the tight flower clusters.
After washing, pat your broccolini dry with paper towels. Removing excess moisture helps create better texture during cooking. Wet vegetables tend to steam instead of developing that desirable crispy edge you’re looking for.
Next, trim the woody ends from each stalk. These tough, fibrous parts won’t soften during cooking. Cut about half an inch to one inch from the bottom. Your broccolini is now ready for whichever cooking method you prefer.
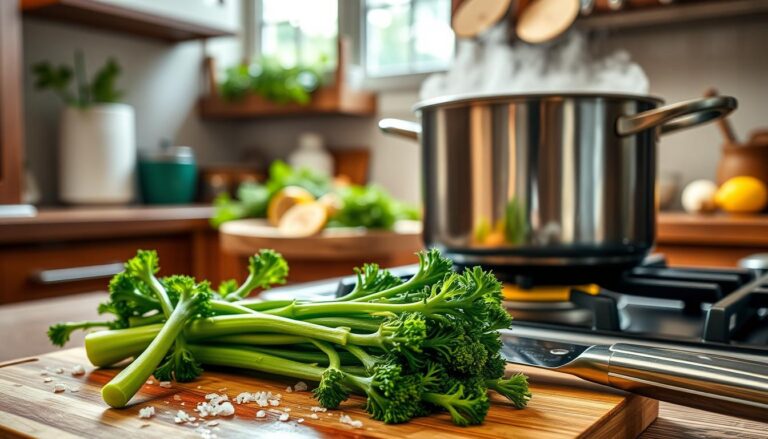
Preparing your vegetables for cooking
Getting your broccolini ready to cook is one of the most important steps in the kitchen. Proper preparation ensures your vegetables cook evenly and stay tender and delicious. Taking a few extra minutes to clean and trim your broccolini makes a real difference in how your final dish turns out. This is where the magic starts before you heat up your stove, oven, or grill.
Washing and Drying Techniques
Start by rinsing your broccolini under cold running water. This simple step removes any dirt, sand, or debris that might be hiding in the florets. Use your fingers to gently rub the stalks and heads while water flows over them. Pay special attention to the crowns where dirt likes to hide.
After washing, drying your broccolini is just as important as cleaning it. Excess water on the surface prevents proper browning during cooking. Pat each stalk dry with clean paper towels or a kitchen cloth. Work carefully to remove all moisture without crushing the delicate florets.
Trimming the Woody Ends
Broccolini stalks have tough, woody ends that need to be removed. Hold each stalk and bend it gently until it snaps naturally. This break point shows you where the tender part begins. The woody portion typically makes up the bottom 1 to 2 inches of the stalk.
You can trim using a sharp knife if you prefer more control. Cut at an angle to remove the tough ends while keeping as much of the tender stalk as possible. Discard the woody pieces.
- Rinse thoroughly under cold water
- Dry completely with paper towels
- Snap or cut away woody stalk ends
- Check florets are clean and dry
With your broccolini cleaned and trimmed, you’re ready to move forward with your chosen cooking method. Proper prep work sets you up for success in the next steps.
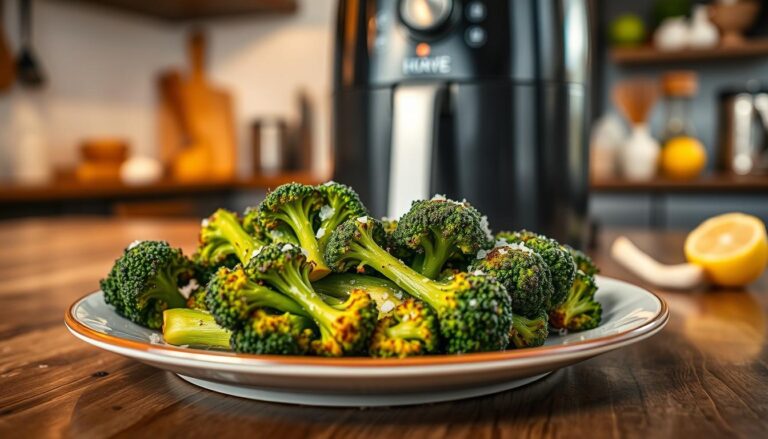
Mastering oven roasted broccolini
Oven roasting brings out the best flavors in your broccolini. When you cook this vegetable in the oven, the natural sugars caramelize and create a sweet, nutty taste. This cooking method also develops crispy florets while keeping the stalks tender. The result is a dish that tastes restaurant-quality in your own kitchen.
Getting the temperature right is key to success. You should set your oven to 400°F for the best results. This heat level creates the perfect environment for caramelization without burning your vegetables. At this temperature, your broccolini will cook evenly and develop that desirable golden-brown color.
Timing matters when you prepare oven roasted broccolini. Most batches need between 15 to 20 minutes to reach perfection. Start checking around the 12-minute mark to see how your vegetables are browning. Every oven runs a bit differently, so keep an eye on your pan during the final minutes of cooking.
Key Temperature and Timing Guide
| Oven Setting | Cooking Time | Expected Result |
|---|---|---|
| 400°F | 15-20 minutes | Crispy florets with tender stalks |
| 375°F | 20-25 minutes | Gentler cooking for delicate pieces |
| 425°F | 12-15 minutes | Darker char for bold flavor |
Arrange your broccolini in a single layer on your baking sheet. Space each piece so they do not touch or overlap. This arrangement allows hot air to circulate around every piece and ensures even browning across your entire batch.
- Check your vegetables at the halfway point
- Shake the pan gently to turn pieces over
- Watch for the edges to turn golden brown
- Remove when florets start to darken slightly
The magic of oven roasting lies in the balance between caramelization and tenderness. You want those crispy, charred edges on your florets while maintaining a soft interior in your stalks. This contrast in texture creates an enjoyable eating experience that simple boiling cannot match.
Essential seasoning tips for flavor
The right seasonings transform simple broccolini into a restaurant-quality dish. Your choice of fat and salt balance makes all the difference between bland and delicious. When you prepare oven roasted broccolini, these seasoning techniques become your secret to impressive results.
Quality ingredients elevate your cooking from ordinary to exceptional. The oils, salts, and peppers you select shape the final taste of your vegetables. Small adjustments in seasoning can change your entire dish.
Using High Quality Olive Oil
Extra virgin olive oil is your best choice for seasoning broccolini. This premium oil adds a rich, fruity flavor that complements the vegetable’s natural taste. When you drizzle high-quality olive oil over your florets, it helps distribute heat evenly during cooking.
Look for cold-pressed extra virgin varieties from trusted brands. These oils contain more polyphenols and antioxidants. The investment in better oil pays off in taste and nutrition.
- Choose oils with dark glass bottles for protection
- Check harvest dates on labels for freshness
- Store away from heat and direct sunlight
- Use about 2-3 tablespoons per pound of broccolini
Balancing Salt and Pepper
Proper seasoning enhances rather than overwhelms the natural vegetable flavor. Start with half a teaspoon of kosher salt per pound of broccolini. Add freshly cracked black pepper for a subtle bite and complexity.
Freshly ground pepper tastes significantly better than pre-ground varieties. The oils in whole peppercorns remain intact until you grind them. This freshness makes a real difference in your final dish.
| Seasoning Type | Amount per Pound | Best Practice |
|---|---|---|
| Kosher Salt | ½ teaspoon | Add before cooking |
| Black Pepper | ¼ teaspoon | Grind fresh just before use |
| Extra Virgin Olive Oil | 2-3 tablespoons | Coat evenly for distribution |
Taste your broccolini as you cook. You can always add more salt, but you cannot remove it. This approach gives you complete control over the final flavor profile.
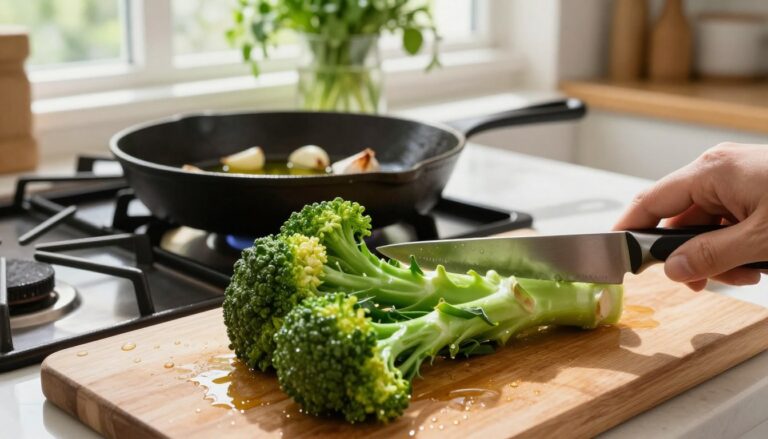
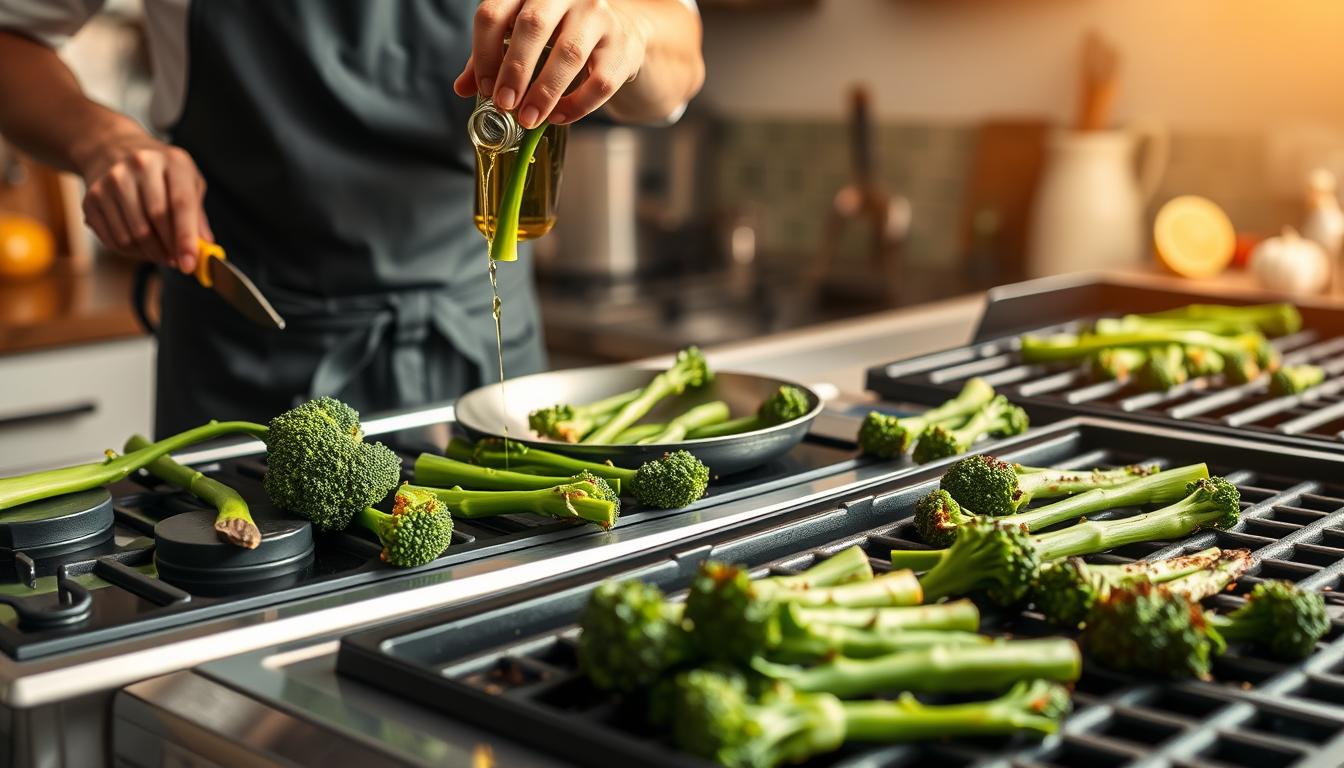
Techniques for stovetop sautéing
Sautéing is one of the fastest and easiest ways to learn how to cook broccolini when you want a quick meal. This stovetop method gives you beautiful caramelized edges while keeping the inside tender and crisp. You control the heat and timing, making it perfect for busy weeknights.
Start by heating a wide skillet over medium-high heat. A larger pan surface helps you achieve an even sear across your broccolini stalks. Add about two tablespoons of good quality oil and let it warm for one minute. The oil should shimmer before you add your vegetables.

Place your trimmed broccolini in the hot pan with the cut side down. Do not move the vegetables around for the first two to three minutes. This creates that desirable golden crust that adds flavor and texture. Once you flip them, cook for another two minutes on the other side.
Boost your dish by adding aromatics right into the pan:
- Minced garlic cloves for a savory kick
- Red pepper flakes for heat and spice
- Fresh ginger slices for brightness
- Diced onions for sweetness
Season your broccolini with salt and pepper during the final minute of cooking. Toss everything together and taste before serving. The entire process takes just five to seven minutes from start to finish.
Achieving the perfect char on the grill
Grilling broccolini brings out a wonderful smoky flavor that complements its natural earthy taste. The grill creates beautiful char marks that add visual appeal and depth to your dish. Getting the right char requires proper planning and close attention to your vegetables during cooking. Understanding how to set up your grill and monitor your broccolini will help you achieve restaurant-quality results at home.
Setting Up Your Grill Zones
Prepare your grill for success by creating different heat zones. Start by preheating your grill to medium-high heat, aiming for a temperature between 375°F and 400°F. This range allows your broccolini stalks to cook through while developing a nice char on the outside.
Create two distinct areas on your grill:
- Direct heat zone – Place this at medium-high heat for charring and searing
- Indirect heat zone – Keep this at lower heat for finishing delicate pieces
This setup gives you flexibility if your broccolini starts cooking too fast. You can move pieces to the cooler zone to prevent burning.
Monitoring for Tenderness
Thin broccolini stalks cook quickly on the grill. Watch your vegetables closely, as they can shift from perfectly charred to overcooked in just a few minutes. Turn your broccolini every 2-3 minutes to develop even char on all sides.
Check for doneness by piercing a stalk with a fork. The stem should be tender but still hold its shape. Look for golden-brown char marks as your visual guide for doneness.
| Doneness Level | Appearance | Texture | Time Range |
|---|---|---|---|
| Lightly Charred | Golden with small char spots | Crisp-tender stalks | 4-5 minutes |
| Medium Charred | Brown with visible char marks | Tender throughout | 6-7 minutes |
| Well Charred | Dark brown with prominent charring | Very tender stalks | 8-9 minutes |
Remove your broccolini from the grill when it reaches your desired tenderness. Let it rest for one minute before serving to preserve the juices and flavors you’ve built through grilling.
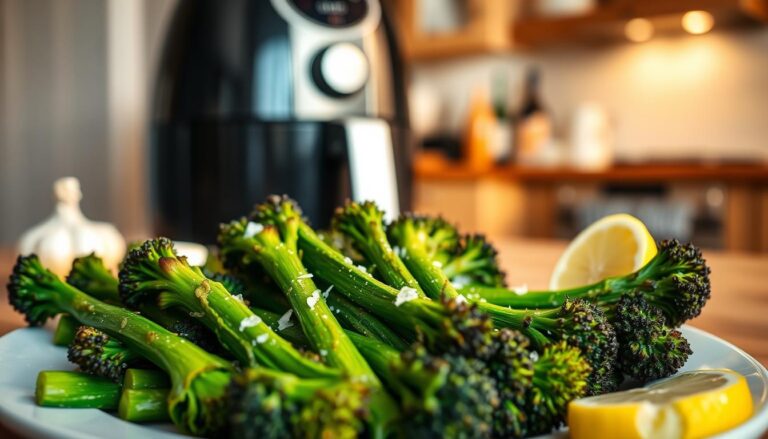
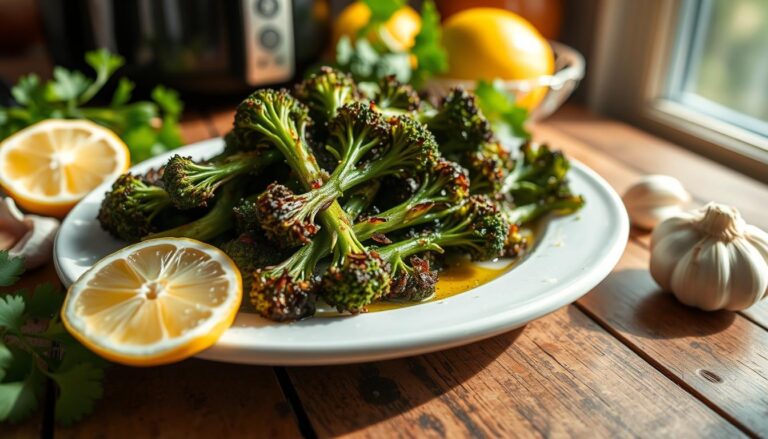
Enhancing your dish with lemon broccolini
A bright squeeze of fresh lemon juice transforms your cooked broccolini into something truly special. This simple finishing touch brings out the natural sweetness of the vegetable while cutting through the richness of the olive oil. Your lemon broccolini becomes a dish that feels restaurant-quality and tastes incredibly fresh.
The acidity from lemon juice works like magic on cooked vegetables. It brightens flavors and adds a refreshing contrast that your taste buds will appreciate. You don’t need much—just a light drizzle of fresh lemon juice right after cooking creates the perfect balance.
Using Fresh Lemon Juice
Squeeze fresh lemon juice directly onto your warm broccolini immediately after removing it from the heat. The warmth helps release the lemon’s aromatic oils, making your dish smell wonderful. Fresh juice works better than bottled options because it tastes brighter and more vibrant.
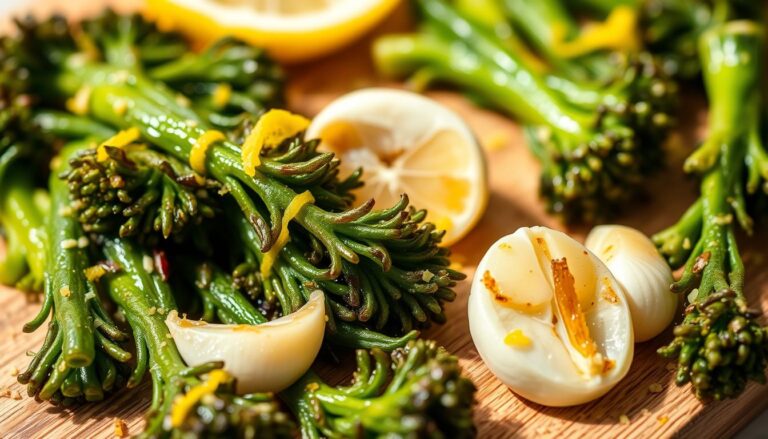
Adding Lemon Zest for Extra Flavor
A sprinkle of lemon zest takes your preparation to the next level. The zest contains concentrated lemon oils that provide intense flavor without extra liquid. You can use a microplane grater to create fine, delicate shreds that distribute evenly across your vegetables.
- Zest your lemon before juicing for easier handling
- Use organic lemons when possible for safety
- Apply zest just before serving for maximum freshness
- Combine zest with a light sprinkle of sea salt for enhanced taste
“A squeeze of lemon can turn simple vegetables into something memorable.”
Your finished lemon broccolini becomes a versatile side dish that pairs beautifully with almost any protein. The bright citrus notes complement fish, chicken, and vegetarian meals equally well.
Pairing suggestions for your meal
Broccolini serves as an incredibly versatile side dish that works beautifully with many different main courses. Your dinner plate becomes more balanced and nutritious when you pair this green vegetable with quality proteins and complementary sides. The mild, slightly sweet flavor of broccolini makes it adaptable to various cuisines and cooking styles.

Serving with Proteins
Broccolini pairs exceptionally well with grilled salmon, roasted chicken, and seared steak. These proteins benefit from the vegetable’s crisp texture and delicate taste.
- Grilled salmon with lemon broccolini creates a light, omega-3-rich meal
- Roasted chicken and broccolini offer a classic, comforting combination
- Seared steak alongside roasted broccolini provides an elegant dinner option
- Pan-seared pork chops work beautifully with garlic-seasoned broccolini
For vegetarian meals, you can build complete plates without meat. Broccolini combines well with grains, legumes, and plant-based proteins to create satisfying dishes.
Complementary Side Dishes
Pairing broccolini with other sides rounds out your meal perfectly. Consider these combinations:
| Primary Protein | Broccolini Preparation | Complementary Side |
|---|---|---|
| Grilled Salmon | Roasted with Lemon | Quinoa Pilaf |
| Roasted Chicken | Sautéed with Garlic | Brown Rice |
| Seared Steak | Charred on Grill | Sweet Potato |
| Vegetarian Bowl | Roasted with Olive Oil | Farro & Chickpeas |
Grains like quinoa and farro add texture and substance to your dining experience. These whole grains complement broccolini’s nutritional profile beautifully.
Storing and reheating leftovers
You worked hard to cook your broccolini to perfection. The good news is you can enjoy those leftovers with smart storage and reheating methods. Proper care keeps your vegetables fresh and tasty for days.
How to Store Your Broccolini Properly
After your meal ends, place any leftover broccolini in an airtight container. Store it in your refrigerator right away. Your cooked broccolini stays fresh for up to three days when stored this way. The airtight seal stops moisture loss and keeps unwanted odors from affecting the taste.
Never leave cooked broccolini sitting at room temperature for more than two hours. Bacteria grow quickly on vegetables left out too long.
Best Methods for Bringing Leftovers Back to Life
You have choices when reheating your broccolini. Each method brings different results to your plate.
- Use a warm skillet with a splash of water to steam the stalks gently
- Place florets in a 350°F oven to restore crispy texture
- Reheat on the stovetop over medium heat for quick results
| Reheating Method | Temperature/Heat Level | Time Needed | Best Result |
|---|---|---|---|
| Skillet with Water | Medium Heat | 3-5 minutes | Tender and Steamed |
| Oven Reheating | 350°F | 5-8 minutes | Crispy Florets |
| Stovetop Direct | Medium Heat | 2-4 minutes | Quick and Easy |
The skillet method works best when you want to avoid mushy texture. Add just a tiny splash of water to the pan. This creates steam that warms everything without overcooking. The oven method restores some of that original crispness to your florets that makes broccolini so enjoyable.
Your leftovers deserve attention and care when you bring them back to the table.
Common mistakes to avoid
Learning how to cook broccolini means understanding the errors that can ruin your dish. Many home cooks make the same pitfalls when preparing this delicate green vegetable. By recognizing these mistakes early, you can transform your broccolini from disappointing to delicious every single time.
Preventing Soggy Stalks
Soggy stalks are the enemy of great broccolini. This happens when you crowd too much into your pan or skillet. Steam builds up and traps moisture around the stalks instead of allowing them to get a nice, crispy exterior.
The fix is simple: give your broccolini space to breathe. Arrange your pieces in a single layer with room between each stalk. You want air to circulate freely. If you need to cook a large batch, split it into two portions. Your patience pays off with better texture and flavor.
Avoiding Overcooking
Overcooking destroys everything you worked for. The bright green color fades to dull olive. The firm, tender texture becomes mushy and unpleasant. Worse yet, you lose valuable nutrients.
Watch your timing closely. Most broccolini cooks in just 5 to 8 minutes on the stovetop. In the oven, aim for 12 to 15 minutes at 400°F. On the grill, keep a close eye for those perfect char marks.
- Check for doneness by piercing a stalk with a fork
- The stem should bend slightly but stay firm
- Stop cooking just before you think it’s done
- Carry-over heat continues the cooking process
How to cook broccolini successfully requires attention to detail and practice. Start with shorter cooking times. You can always cook longer, but you cannot undo overcooking.
Conclusion
You now have the tools to cook broccolini in three different ways. Stovetop sautéing gives you quick results on busy weeknights. Oven roasting brings out the natural sweetness of the vegetable. Grilling adds a smoky flavor that people love at summer cookouts.
Mastering these simple methods allows you to enjoy fresh, flavorful vegetables throughout the week. Your kitchen skills will grow as you practice each technique. Trying lemon broccolini opens up new flavor combinations for your meals.
The best way to learn is by experimenting in your own kitchen. Start with your preferred cooking method and adjust the seasonings to match what you like. Test different cooking times until you find the perfect texture for your taste. Your family will enjoy the results of your effort and practice.
Use these cooking methods with confidence when planning your next meal. Quality olive oil, fresh lemon, and simple seasonings make a big difference in the final dish. You have everything you need to create delicious broccolini that your household will request again and again.
FAQ
What exactly is broccolini and how does it differ from regular broccoli?
Broccolini is a unique vegetable hybrid created by the Sakata Seed Company in 1993, combining the best traits of broccoli and Chinese kale. Unlike traditional broccoli, broccolini offers a milder, sweeter flavor profile that makes it a favorite for various culinary applications. The stalks are more slender and tender, requiring less cooking time overall.
What are the nutritional benefits of broccolini?
Broccolini is packed with essential nutrients like Vitamin C and Vitamin A, which are vital for maintaining a healthy immune system. This cruciferous green provides significant nutritional value while remaining low in calories, making it an excellent choice for balanced, health-conscious meals.
How do you wash and prepare broccolini before cooking?
Start by thoroughly washing the stalks under cold running water to remove any grit or debris trapped in the florets. After washing, pat the vegetables completely dry, as excess moisture can prevent the stalks from browning properly during the cooking process. Trimming the woody ends of the stalks ensures even cooking throughout.
What is the best temperature and time for oven roasted broccolini?
Set your oven to 400°F to create the ideal environment for oven roasted broccolini. Aim for a total cooking time of 15 to 20 minutes to achieve the perfect balance of texture and flavor. This method intensifies the natural sweetness of the vegetable through caramelization, making the stalks tender while the florets turn crispy.
Why is high-quality olive oil important when cooking broccolini?
Using high-quality extra virgin olive oil helps distribute heat evenly throughout your broccolini and adds a rich, fruity note to the finished dish. Quality olive oil is essential for achieving proper browning and enhancing the overall flavor profile of your preparation.
How do you balance seasoning when preparing broccolini?
Carefully balance your salt and freshly cracked black pepper to ensure that the natural flavor of the vegetable is enhanced rather than overwhelmed. This simple approach allows the delicate taste of the broccolini to shine through while complementing its inherent sweetness.
What is the fastest way to cook broccolini on the stovetop?
Sautéing is an excellent method to learn how to cook broccolini quickly when you are short on time. Use a wide skillet over medium-high heat to achieve a beautiful sear on the stalks while keeping the interior tender. This method also allows you to incorporate aromatics like garlic or red pepper flakes directly into the pan for added depth.
What grill temperature should you use for broccolini?
Set up your grill for medium-high heat, targeting a temperature range between 375°F and 400°F to ensure the stalks cook through without burning. This temperature range allows grilling to add a distinct smoky flavor that pairs exceptionally well with the natural earthiness of broccolini.
How do you prevent broccolini from burning on the grill?
Monitor the vegetables closely during grilling, as the thin stalks can transition from perfectly charred to overcooked in just a few minutes. Setting up grill zones ensures you can move the broccolini if needed and check for tenderness frequently throughout the cooking process.
How do you make lemon broccolini?
Finishing your dish with a bright, acidic element is the best way to create vibrant lemon broccolini. Apply a simple squeeze of fresh lemon juice or a sprinkle of zest immediately after cooking to cut through the richness of the olive oil. This final touch adds a refreshing contrast that highlights the delicate, sweet notes of the vegetable.
What proteins pair well with broccolini as a side dish?
Broccolini is an incredibly versatile side dish that pairs well with grilled salmon, roasted chicken, or seared steak to create a balanced and nutritious dinner plate. The vegetable’s mild sweetness complements both light and rich protein preparations.
What are good complementary side dishes to serve with broccolini?
For vegetarian meals, consider pairing broccolini with grains like quinoa or farro to add texture and substance to your dining experience. These combinations create complete, satisfying meals that provide both flavor and nutritional balance.
How long can you store cooked broccolini?
If you have leftovers, you can store them in an airtight container in the refrigerator for up to three days. Proper storage in an airtight container helps maintain freshness and prevents the vegetable from absorbing odors from other foods.
What is the best way to reheat leftover broccolini?
To reheat, place the stalks in a warm skillet with a tiny splash of water to steam them back to life without making them mushy. Alternatively, a quick blast in the oven at 350°F can help restore some of the original crispness to the florets and prevent the vegetable from becoming soggy.
Why do crowded pans result in soggy broccolini?
One common mistake is overcrowding the pan, which traps steam and leads to soggy stalks instead of a nice sear. You should arrange the broccolini in a single layer with adequate space between pieces to allow proper browning and air circulation during cooking.
What happens when you overcook broccolini?
Overcooking can cause the vegetable to lose its vibrant green color and firm texture. You should be mindful of the cooking time and monitor your broccolini closely to ensure it reaches the ideal balance between tenderness and structural integrity, preserving both its appearance and nutritional value.