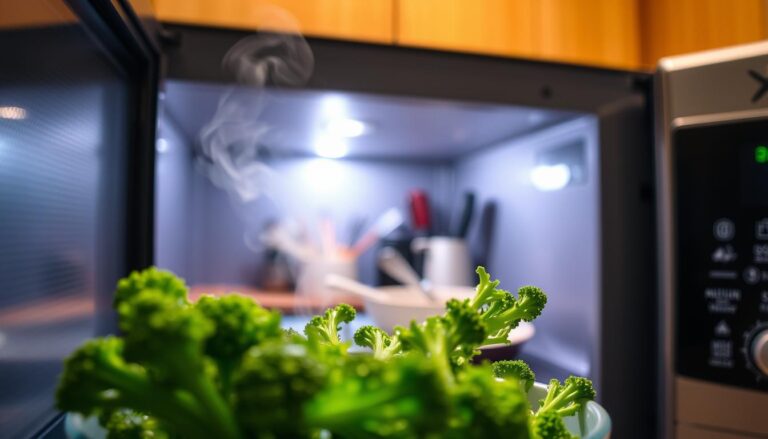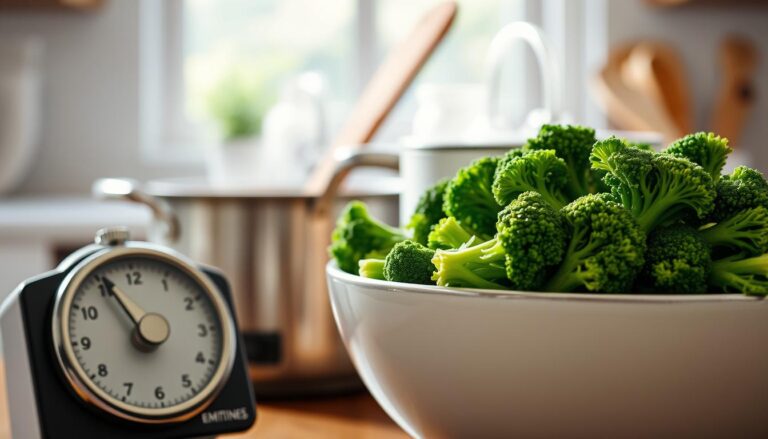
Oven Roasted Broccolini: Crispy, Tender & Ready in 20 Minutes
You can create a restaurant-quality vegetable side dish at home in just 20 minutes. Oven roasted broccolini transforms simple ingredients into a gourmet experience that works for any weeknight dinner. This unique hybrid vegetable was first developed by the Sakata Seed Company in 1993. It combines the familiar taste of broccoli with a tender, delicate texture.
Learning to cook oven roasted broccolini opens up new possibilities for your dinner table. The process requires only basic kitchen skills and equipment you likely own. Professional techniques make all the difference between soggy vegetables and perfectly crispy stalks. You will discover how heat and proper seasoning bring out the natural sweetness of this vegetable.
This guide walks you through every step of preparing oven roasted broccolini. From selecting the best produce at your local grocery store to plating your finished dish, you will learn expert methods. These techniques take the guesswork out of cooking. You get consistent results that impress family and guests alike.
Your weeknight meals are about to become tastier and more exciting. Fresh vegetables do not need complicated recipes or long cooking times. You will see that roasting brings out flavors you did not know existed. Read on to master this simple cooking technique.
Why You Will Love This Vegetable Side
Oven roasted broccolini offers more than just great taste. This simple side dish brings real nutritional value to your dinner table while tasting absolutely delicious. Your family gets to enjoy a meal that’s both good for them and satisfying to eat.
The magic of roasting transforms a humble green vegetable into something special. The cooking method creates flavors that other preparation styles cannot match. Your taste buds will notice the difference right away.
Health Benefits of Green Vegetables
Adding green vegetables to your diet boosts your intake of essential nutrients. Broccolini packs a powerful punch of nutrition in every bite.
- Vitamin K supports bone health and blood clotting
- Vitamin C strengthens your immune system
- Fiber aids digestion and keeps you feeling full
- Antioxidants protect your cells from damage
- Minerals like potassium support heart function
These nutrients work together to keep your body running smoothly. Eating green vegetables regularly becomes easier when you prepare them in ways you truly enjoy.
Why Roasting Enhances Natural Flavors
Roasting creates a special chemical reaction called the Maillard reaction. This process caramelizes the natural sugars inside the vegetable, building deep, complex flavors that make your mouth water.
Boiling or steaming cannot create these same flavors. Roasting is the superior method for home cooking. Your roasted broccolini develops crispy edges while staying tender inside. Even people who normally skip their vegetables come back for seconds when you serve roasted broccolini. The difference in taste is that noticeable and that good.
Selecting the Best Produce at the Market
Finding quality broccolini starts with knowing what to look for when you shop. Your choice of raw ingredients makes a real difference in how your final dish tastes and feels. Taking time to pick the best bundles now saves you from disappointment later.
When you visit your local grocery store or farmers market, inspect each bunch with care. Look for these signs of freshness:
- Firm stalks that do not bend or feel limp when you hold them
- Bright green florets with no yellow spots or browning
- Crisp stems that snap when you gently bend them
- Leaves that feel dry and not slimy or wet
Start by checking the color of the florets. You want a vibrant, deep green appearance. Yellowing or wilting signals that the vegetable is past its prime. Run your fingers along the stalks to feel for firmness. Soft or bendy stems mean the produce is aging.
Pay close attention to the base of each stalk. The cut end should look fresh and moist, not dried out or brown. Avoid bunches with slimy or wet leaves, as this points to decay.
Choose bundles with thick, sturdy stems over thin, fragile ones. Thicker stalks tend to hold their texture better during roasting. Your effort in picking quality produce at the store sets you up for a delicious, perfectly cooked side dish at home.
Essential Tools for Your Kitchen
Preparing oven roasted broccolini becomes much easier when you have the right equipment on hand. Quality kitchen tools make the cooking process smoother and help you achieve better results every time. Your success in the kitchen starts with investing in basics that work well and last for years.
The right baking sheet and parchment paper are two items that transform your roasting experience. These tools prevent sticking, improve heat distribution, and make cleanup quick and simple. Once you understand how to use these items effectively, you will notice a real difference in your cooking.
Choosing the Right Baking Sheet
Your baking sheet is the foundation of successful roasting. A standard 13 by 18 inch half-sheet pan works best for most home kitchens. This size allows heat to circulate evenly around your vegetables from all directions.
Look for baking sheets made from heavy-duty aluminum or steel. These materials heat up quickly and distribute warmth uniformly across the entire surface. Avoid thin, cheap pans that bend easily or create hot spots during cooking.
- Half-sheet pans (13×18 inches) fit standard ovens perfectly
- Heavy-duty construction prevents warping
- Raised edges keep oil and seasonings contained
- Darker pans absorb more heat for crispier edges
Using Parchment Paper for Easy Cleanup
Parchment paper is your secret weapon for mess-free cooking. Line your baking sheet with parchment before adding your broccolini. This simple step prevents sticking and cuts your cleanup time in half.
Quality parchment paper can handle temperatures up to 420°F, which is perfect for roasting vegetables. The paper creates a barrier between your food and the pan surface, allowing steam to circulate while preventing browning underneath.
| Tool or Item | Purpose | Best Option |
|---|---|---|
| Half-Sheet Pan | Holds and heats vegetables | Heavy-duty aluminum, 13×18 inches |
| Parchment Paper | Prevents sticking and eases cleanup | Heat-resistant, food-grade paper |
| Cooking Oil | Adds flavor and aids browning | Extra virgin olive oil |
| Mixing Bowl | Combines broccolini with seasonings | Medium ceramic or glass bowl |
Parchment paper also prevents your broccolini from sticking to the pan, so you can enjoy perfectly roasted vegetables without the frustration of cleanup.
How to Make Oven Roasted Broccolini
Learning how to make broccolini in your oven transforms a simple vegetable into a restaurant-quality side dish. The entire process takes just 20 minutes from start to finish, making it perfect for busy weeknights when you want something healthy and delicious. This straightforward method produces oven roasted broccolini with crispy, caramelized edges while keeping the interior tender and juicy.
The beauty of this cooking technique lies in its simplicity. You do not need special skills or fancy equipment to create impressive results. By following a few key steps, you will master the art of roasting broccolini in your own kitchen.

The basic workflow involves four main stages that work together seamlessly. Each step builds on the previous one to ensure you get perfect results every single time.
- Prepare your broccolini by washing and trimming
- Toss with oil and seasonings for flavor
- Arrange on a prepared baking sheet
- Roast until edges turn golden brown
The key to success is not rushing the process. Each stage matters for achieving that ideal combination of crispy edges and tender stalks. The roasting process brings out natural sweetness in the vegetable that you simply cannot get from boiling or steaming.
Roasting vegetables concentrates their flavors and creates depth that transforms ordinary side dishes into memorable meals.
Your investment in learning this technique pays off immediately. Once you understand the basics of oven roasted broccolini preparation, you can adjust seasonings and cooking times based on your preferences and oven characteristics.
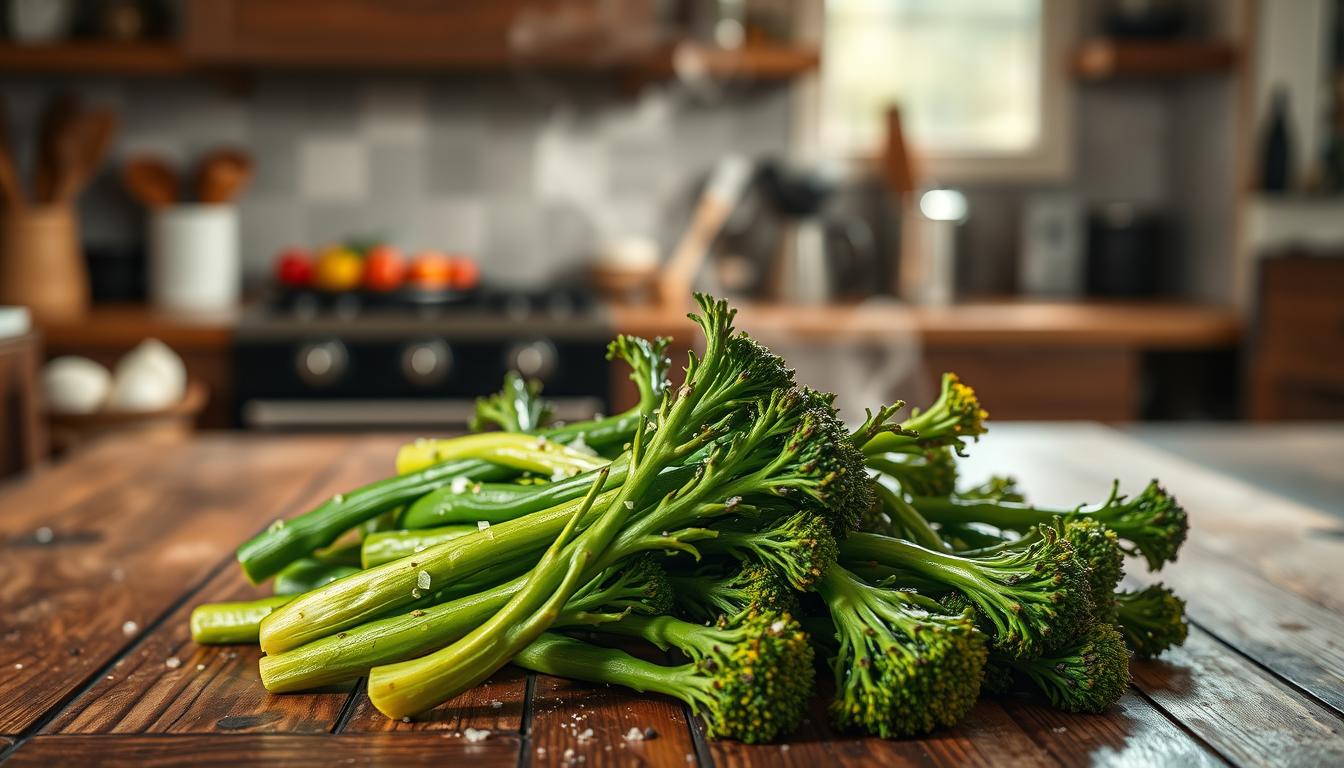
Trimming and Preparing Your Stalks
Getting your broccolini ready is one of the most important steps in learning how to make broccolini that tastes great. Taking time to clean and trim your vegetables properly makes a real difference in the final result. Your dish will have better texture and flavor when you start with well-prepared stalks.
The preparation process only takes a few minutes but gives you much better results. You will notice the difference once you bite into your roasted vegetable. Proper prep work removes dirt and tough parts that can ruin your eating experience.
Proper Washing Techniques
Start by rinsing your broccolini under cool running water. Use your fingers to gently rub the florets and remove any dirt or debris hiding between the tiny flower parts. Pay close attention to the crown area where soil tends to collect.
- Hold the stalks under flowing water
- Rub florets gently with your fingertips
- Check for hidden dirt in tight spaces
- Pat dry with a clean kitchen towel
Removing Woody Ends
Once your stalks are clean and dry, focus on the bottom part. Remove the bottom 1 to 2 inches where the wood-like texture lives. This fibrous section is tough to chew and does not taste pleasant in your finished dish.
Use a sharp knife and cut straight across. You can snap off the tough ends by hand if you prefer. Discard these woody pieces and keep the tender upper stalks for roasting.
“The tender portions of broccolini cook evenly and develop that perfect crispy-tender texture your family will love.”
These few extra minutes of careful preparation set you up for success when you cook. Your broccolini will have better texture from top to bottom.
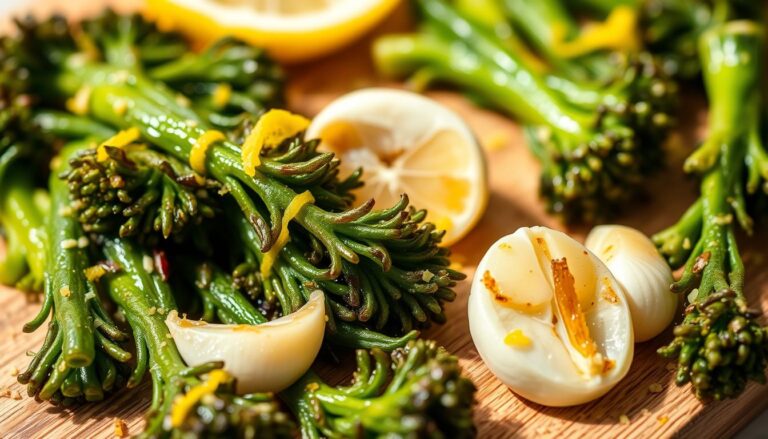
Seasoning for Maximum Flavor
The right seasonings transform your roasted broccolini into a dish that tastes amazing. This is where you get to personalize your meal and make it exactly how you like it. Start by thinking about what flavors you enjoy, then build from there.
Begin with a high-quality extra virgin olive oil. This ingredient creates a rich base that brings out the natural taste of your vegetables. Add sea salt generously to enhance the earthy flavor that broccolini offers naturally. These two simple ingredients work together to make your dish taste fresh and delicious.
You can create many different flavor combinations depending on your mood. Consider these popular seasoning options:
- Garlic powder for a savory, rich taste
- Red pepper flakes for a spicy kick
- Cracked black pepper for depth and warmth
- Lemon zest for brightness and tang
- Parmesan cheese for umami and saltiness
When preparing lemon broccolini, remember that less is often more. Your goal is to enhance the vegetable’s natural taste, not cover it up with too many strong spices. Start with small amounts of each seasoning, then taste and adjust.
| Seasoning | Best For | Amount Per Pound |
|---|---|---|
| Garlic Powder | Rich, savory dishes | ½ teaspoon |
| Red Pepper Flakes | Adding heat and spice | ¼ teaspoon |
| Black Pepper | Classic, everyday flavor | ¼ teaspoon |
| Lemon Zest | Fresh, citrus brightness | 1 tablespoon |
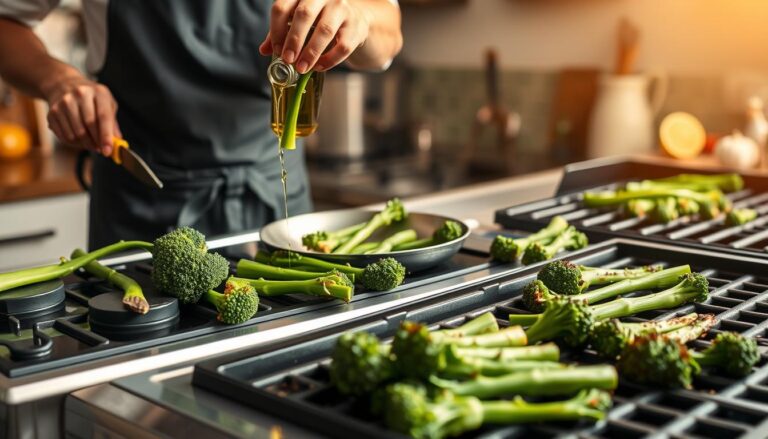
Toss your prepared broccolini with olive oil and seasonings before placing it in the oven. This ensures every piece gets coated evenly with your chosen flavors. The roasting process will intensify these seasonings, making them taste even stronger as the vegetables cook.
Achieving the Perfect Texture
Getting the right texture when you prepare oven roasted broccolini takes skill and attention to detail. The balance between heat and airflow in your oven makes all the difference between crispy edges and mushy vegetables. Understanding how these factors work together helps you create a dish your family will love every single time.
Understanding Oven Temperatures
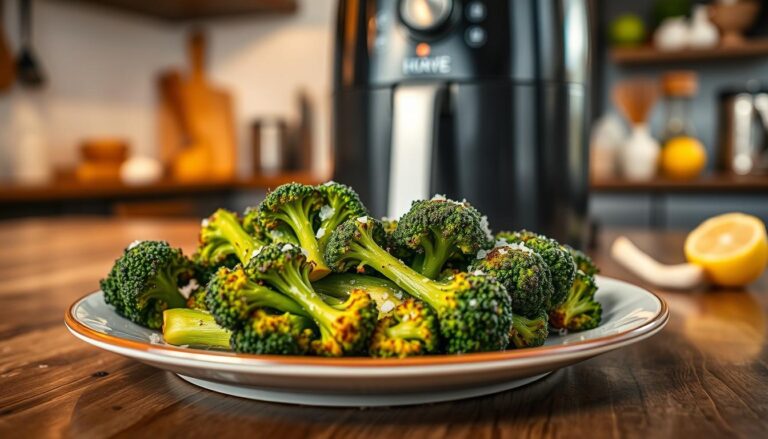
The right temperature is essential for learning how to cook broccolini properly. Roasting at 400°F (204°C) gives you the best results for achieving beautiful caramelization without burning the delicate florets. This temperature allows the outer edges to crisp up while keeping the inside tender.
Lower temperatures around 375°F tend to steam the vegetables instead of roasting them. Temperatures above 425°F may burn the tips before the stalks finish cooking. Stick with 400°F as your target temperature for consistent, delicious results.
Avoiding Soggy Stalks
Moisture is the enemy of crispiness. To keep your oven roasted broccolini crispy, follow these important steps:
- Pat the broccolini completely dry after washing
- Avoid crowding your baking sheet
- Spread pieces in a single layer with space between them
- Use a wire rack if possible for better air circulation
- Check vegetables halfway through cooking time
Overcrowded pans trap steam around the vegetables, causing them to soften. Space allows hot air to circulate, creating those golden, crispy edges you want.
How to Cook Broccolini for Crispy Edges
Getting those perfect crispy edges on your vegetables requires understanding the right cooking technique. The key to mastering how to cook broccolini lies in proper arrangement on your baking sheet. When you spread the stalks in a single layer, you allow hot air to circulate around each piece. This prevents the vegetables from steaming in their own moisture, which is what causes them to become soft and limp.

Learning how to make broccolini with that restaurant-quality finish starts with spacing. Space is your best friend when you want a golden-brown exterior. Crowding your baking sheet defeats the purpose of roasting because steam builds up between the pieces. This trapped moisture softens the exterior instead of crisping it.
Here are the essential spacing guidelines for your oven roasted broccolini:
- Leave at least one inch between each stalk
- Arrange florets in a single layer without overlapping
- Position pieces with cut-sides facing down
- Ensure the baking sheet has enough surface area for proper heat circulation
This simple adjustment in your cooking method transforms your dish from basic to exceptional. When you follow these spacing rules, the direct heat from below creates that desirable caramelization on the cut surfaces. Your vegetables develop depth and complexity that makes them irresistible on the dinner table.
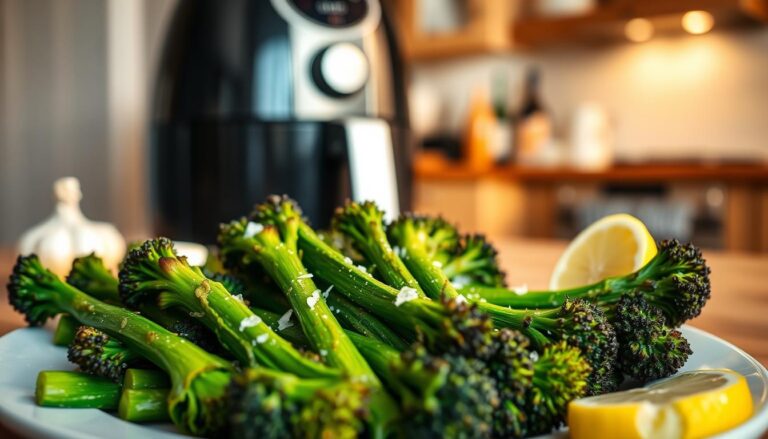
Serving Suggestions for Lemon Broccolini
Your perfectly roasted broccolini deserves a thoughtful presentation that brings out its best qualities. The right accompaniments and finishing touches transform a simple side dish into a memorable part of your meal. Fresh citrus, quality proteins, and savory toppings work together to create a complete dining experience that your family will enjoy.
Pairing with Proteins
Lemon broccolini pairs beautifully with many protein options. The bright, roasted flavor of the vegetable complements lean meats and seafood especially well. Consider these protein pairings for your next meal:
- Grilled chicken breast with herbs
- Seared salmon fillet with garlic butter
- Pan-roasted pork tenderloin
- Baked cod or halibut
- Grilled steak with rosemary
- Turkey meatballs with marinara
The acidity from lemon cuts through rich protein flavors, creating a balanced plate that tastes fresh and satisfying.
Adding Finishing Touches Like Parmesan
Simple additions elevate your dish from good to exceptional. A sprinkle of freshly grated Parmesan cheese adds a salty, savory finish that ties all the flavors together beautifully. Squeeze fresh lemon juice over the warm stalks right before serving to brighten the roasted taste.
| Finishing Touch | Flavor Profile | Best Amount |
|---|---|---|
| Fresh lemon juice | Bright, acidic, citrusy | 1-2 tablespoons per serving |
| Parmesan cheese | Salty, umami, nutty | 2-3 tablespoons grated |
| Red pepper flakes | Spicy, warm heat | Pinch to taste |
| Garlic chips | Pungent, aromatic | 1 teaspoon per serving |
| Pine nuts | Nutty, crunchy, rich | 1 tablespoon per serving |
“The secret to great cooking lies not in complicated techniques, but in quality ingredients and thoughtful presentation.”
Combine lemon juice with melted butter and minced garlic for a simple sauce. Drizzle this mixture over your roasted broccolini just before serving. The combination of citrus, butter, and cheese creates layers of flavor that make each bite interesting and delicious.
Storing and Reheating Leftovers
When you prepare oven roasted broccolini, you might have extra portions left over. The good news is that storing your leftovers takes minimal effort. Your roasted broccolini stays fresh and tasty when kept in an airtight container in the refrigerator for up to three days. This makes meal planning easier during busy weeks.
Knowing how to cook broccolini leftovers properly helps you enjoy them as much as your first serving. The key is choosing the right reheating method to bring back that crispy texture you worked hard to achieve.
Best Reheating Methods
You have several options for warming your leftover broccolini. The hot skillet method works wonderfully for restoring crispiness. Simply heat a skillet over medium-high heat for two to three minutes. Place your broccolini pieces in the hot pan and cook for three to five minutes, shaking the pan occasionally. This approach brings back the roasted appeal and creates fresh, crispy edges.
A toaster oven is your second best choice. Set it to 375 degrees Fahrenheit and place your broccolini on a baking sheet. Heat for five to seven minutes until warmed through. Avoid the microwave whenever possible, as it softens the texture and removes all that delicious roasted character.
- Store in an airtight container
- Keep refrigerated for up to three days
- Reheat using a skillet or toaster oven
- Avoid microwaving for best results
- Serve immediately after reheating
With proper storage and reheating techniques, your leftover broccolini delivers the same enjoyment as a freshly cooked batch.
Conclusion
You now have all the skills needed to master oven roasted broccolini in your own kitchen. This simple cooking method turns fresh vegetables into something special. The key is paying attention to preparation, heat levels, and quality seasonings. With practice, you will create side dishes that impress your family and friends.
Lemon broccolini offers bright, fresh flavors that work well with many meals. The roasting process brings out natural sweetness in the vegetable while creating those crispy edges everyone loves. Your dinner table will benefit from this easy yet delicious addition. Simple ingredients and proper technique are all you need to succeed.
Keep experimenting with your own twists on this classic dish. Try different seasonings, oils, or cooking times to find what you like best. The techniques you learned here work for many other vegetables as well. Roasting is a skill that opens doors to endless cooking possibilities in your home kitchen.
FAQ
How long does it take to prepare oven roasted broccolini?
From start to finish, preparing oven roasted broccolini takes approximately 20 minutes. This includes trimming, seasoning, roasting, and plating your vegetables. This quick cooking time makes it an ideal choice for busy weeknight dinners when you need a nutritious side dish without spending hours in the kitchen.
What temperature should you use when learning how to cook broccolini in the oven?
The ideal temperature for oven roasted broccolini is 400°F (204°C). This industry-standard temperature allows your vegetables to achieve beautiful caramelization on the exterior while maintaining a tender center. At this heat level, you will avoid burning the delicate florets while still creating those desirable crispy edges that make this dish so appealing.
What are the health benefits of incorporating more broccolini into your diet?
Broccolini is packed with essential nutrients that support your overall wellness. It is an excellent source of Vitamin K, which supports bone health and blood clotting, and Vitamin C, which boosts your immune system. By regularly preparing oven roasted broccolini, you are making a simple choice to increase your intake of vital green vegetables that nourish your body.
How do you select the best broccolini at the grocery store or farmers market?
When choosing broccolini for oven roasted broccolini, prioritize produce with firm stalks that do not bend easily and vibrant green florets with no yellowing or wilting. Inspect the bundles carefully to ensure the stems are crisp and the leaves are not slimy. High-quality raw ingredients are the most important step in ensuring your final dish has the best possible texture and taste.
What equipment do you need for preparing oven roasted broccolini at home?
The essential tools for how to make broccolini include a standard 13×18 inch half-sheet pan for even heat distribution and parchment paper to line your pan. Parchment paper prevents sticking and makes post-dinner cleanup significantly faster. Investing in these basic kitchen staples will improve your consistency every time you prepare roasted vegetables.
What is the proper way to wash and trim broccolini before roasting?
Proper preparation is crucial for learning how to make broccolini that is pleasant to eat. Start by washing the stalks thoroughly under cool running water to remove any dirt or debris hidden in the florets. After drying them completely, focus on removing the bottom 1-2 inches of the woody stalk, as this part is often too fibrous to enjoy. Taking these extra few minutes to prep your vegetables will significantly improve the final texture.
How should you arrange broccolini on the baking sheet for crispy edges?
To achieve those desirable crispy edges when learning how to cook broccolini, you must spread the stalks in a single layer on your baking sheet. This arrangement is essential because it prevents the vegetables from steaming in their own moisture. Avoiding overcrowding the pan is your best friend for achieving a golden-brown finish and transforming your oven roasted broccolini into a restaurant-quality dish.
What seasonings work best for lemon broccolini?
Start your seasoning with high-quality extra virgin olive oil and a generous pinch of sea salt to enhance the natural earthiness of the vegetable. You can also experiment with garlic powder, red pepper flakes, or cracked black pepper to create a more complex taste. For lemon broccolini specifically, fresh lemon juice provides a bright acidity that cuts through the rich, roasted flavor of the stalks and elevates the entire dish.
Why is roasting a superior cooking method for broccolini compared to boiling or steaming?
Roasting triggers the Maillard reaction, which caramelizes natural sugars within the plant fibers and creates a depth of flavor that boiling or steaming simply cannot replicate in a home kitchen. This chemical process transforms simple vegetables into a gourmet experience with complex, savory notes that make even reluctant vegetable eaters crave a second serving.
How should you serve oven roasted broccolini for a complete meal?
Once your vegetables are perfectly roasted, enhance them with finishing touches to create a balanced dinner. Pair lemon broccolini with proteins like grilled chicken or seared salmon for a nutritious, well-rounded meal. Add a final sprinkle of freshly grated Parmesan cheese for a savory, salty finish that ties all the flavors together beautifully.
How long can you store leftover oven roasted broccolini?
Place your leftovers in an airtight container and keep them in the refrigerator for up to 3 days to maintain the best quality. When you are ready to eat, you can learn how to cook broccolini leftovers by reheating them in a hot skillet or toaster oven to regain some of that original crispiness. Avoid using the microwave if possible, as it tends to soften the texture and remove the roasted appeal.
When was broccolini first developed, and where did it originate?
Broccolini is a unique hybrid vegetable that was first developed by the Sakata Seed Company in 1993. This relatively recent introduction to the vegetable world combines the nutritional benefits of broccoli with the tender stalks of Chinese kale, creating a vegetable that is both nutritious and delicious when prepared using proper oven roasting techniques.
What is the difference between broccolini and regular broccoli when learning how to cook them?
While both vegetables are nutritious members of the brassica family, broccolini features longer, more slender stalks and smaller florets compared to regular broccoli. These physical differences mean that broccolini requires less cooking time and is more tender throughout when prepared using oven roasting methods. The entire stalk of broccolini becomes edible and enjoyable after proper trimming, whereas regular broccoli often leaves woody stems.